Quantcast
Channel: SSRS - System Center Dudes
Viewing all 31 articles
Browse latest View live

New SCCM Endpoint Protection Dashboard and Reports Available

$
0
0

A few days ago we released three new Endpoint Protection reports. Together these reports give you a great insight into how well your Endpoint Protection clients are doing.

These reports are also available bundled together with Jonathan Lefebvre Endpoint Protection Management Guide at a discounted price.

SCCM Endpoint Protection Dashboard

This report shows you useful information about endpoint protection on a single page.

The boxes at the top show current status as well as a trend for the last 30 days for each of the 5 categories a client can be in (Protected-Inactive-At Risk-Unprotected-Infected) .

The two At Risk and Unprotected categories shows a breakdown of the subcategories that make up the these two states. If you bought the System Health – Endpoint Protection reports you can click on a number and it will drill-trough to a filtered sub report that will show you the troubled clients.

[su_box title=”Note” style=”glass” box_color=”#000000″ title_color=”#F0F0F0″]A client can be in multiple states, it can be both Inactive and At Risk at the same time.[/su_box]

The Malware Detected and and Malware Activity charts gives you a good overview over what malware is detected and how many clients are infected per day.  If you bought the System Health – Endpoint Protection reports you can click on a either a specific malware or a specific day to drill-trough to a filtered sub report for more information.

SCCM Endpoint Protection Dashboard Report

System Health – Endpoint Protection

This report can be used by itself, but works great as a sub report for the Endpoint Protection Dashboard. It gives you detailed information about the endpoint protection clients in a defined collection.

SCCM Endpoint Protection Dashboard Report


System Health – Malware Detection

The Malware Detection report gives details about malware that’s detected in a given collection. Information like Client Name, Detection time , Threat name and category , Severity and most importantly if it was successfully cleaned. It can be used standalone or as a sub report of the Endpoint Protection Dashboard.

SCCM Endpoint Protection Dashboard Report


Additional details can be found on each report page accessible from our menu or directly from our main product page.

The post New SCCM Endpoint Protection Dashboard and Reports Available appeared first on System Center Dudes.


Windows 10 Compatibility Check using SCCM and Report

$
0
0

When planning for a Windows 10 migration, understanding your environment is the key. Luckily, Windows 10 setup comes with command line options which one of them is an excellent compatibility check (/Compat ScanOnly). This command can be used on a Windows 7,8 or 10 devices before a migration in order to see if those devices are Windows 10 compatible. Using SCCM, we will run this Windows 10 compatibility check, return the results in the SCCM database and use this data to build a comprehensive report. This report can be used to detect and fix migration errors before the actual Windows 10 deployment.

SCCM Windows 10 Compatibility Check Package Creation

We will start by creating a package for Windows 10 compatibility check. The source of this package must be the Windows 10 installation media. The deployment option and command line is important here. If they are not set correctly you’ll end up sending the complete installation media (including Install.wim) to the computers only for a compatibility check which is not really effective. Using our proposed methods, you’ll be using about 250mb on the client drive instead of 5gb.

  • In the SCCM Console, go to Software Library / Application Management / Packages
  • Create a new package

SCCM Windows 10 Compatibility Check

  • Name your package and specify your Windows 10 installation media as the source file. Be aware that setup.exe is language specific. If you have EN-US machine, you must provide EN-US media

SCCM Windows 10 Compatibility Check

  • Create a Standard Program

SCCM Windows 10 Compatibility Check

  • Command Line : SETUP.EXE /Auto Upgrade /Quiet /NoReboot /DynamicUpdate Enable /Compat ScanOnly
    • /DynamicUpdate: Enabling it causes setup to download the latest compatibility information from Windows Update
    • /CopyLogs parameter can also be added at the end. Use it to copy setup logs to a shared network drive. The problem with that switch is that the logs are not classified using computer names, it will be a nightmare finding the right logs after hundreds of deployments. This is why I’m not using it for this blog post.

SCCM Windows 10 Compatibility Check

  • In the Requirements page, select your operating systems

SCCM Windows 10 Compatibility Check

  • Complete the wizard

SCCM Windows 10 Compatibility Check

  • Right-click your package and distribute it to your distribution points

SCCM Windows 10 Compatibility Check

Deploy Windows 10 compatibility check on a test computer

We will now deploy the Windows 10 compatibility check program on a computer that runs Windows 10 1607. In our test, we want to evaluate if this computer can upgrades from Windows 10 1607 to 1709. Create a test collection and deploy the newly created program to a test device.

  • Right-Click your package and select Deploy
  • On the General tab, select your collection

SCCM Windows 10 Compatibility Check

  • On the Content tab, ensure that your content is distributed to your distribution point

SCCM Windows 10 Compatibility Check

  • Select your deployment purpose – Available or Required

SCCM Windows 10 Compatibility Check

  • On the Scheduling pane, select your schedule

SCCM Windows 10 Compatibility Check

  • On the User Experience pane, select the desired options

SCCM Windows 10 Compatibility Check

  • On the Distribution Points pane, select Run program from distribution point

SCCM Windows 10 Compatibility Check

  • Review your choice and complete the wizard

SCCM Windows 10 Compatibility Check

Running the Compatibility Check

On a targeted computer, run the program manually in the Software Center (Available) or wait for the schedule to trigger your deployment (Required).

The installation will starts. It will take about 5 minutes to complete… and it will fail. This is normal as the error code returned by the compatibility check will always be an error. (No problem will be 0xC1900210 -1047526896).

SCCM Windows 10 Compatibility Check

If you need more information about the error, look at Setupacr.log or Setuperr.log generated by Setup.exe. They are located in C:\$WINDOWS.~BT\Sources\Panther folder. (Or in the specified path if you use the /CopyLogs parameter in your command line. We cover the topic on how to troubleshoot Windows 10 error in this blog post

Once we tested on a couple of test machine and are happy with results, we can expand our deployment to all computers.

From there, what’s the easy way to check your compatibility results? You could go in the Monitoring / Deployment section in the console… or you build a custom report.

Windows 10 Compatibility Check Report

Luckily for you, we created a report which will give you a quick overview of your compatibility success or failure. We also included basic hardware inventory information for you to refer if a computer is not compliant because of hardware limitation. The only thing you need to do is to select your Compatibility package and run the report !

SCCM Windows 10 Compatibility Check

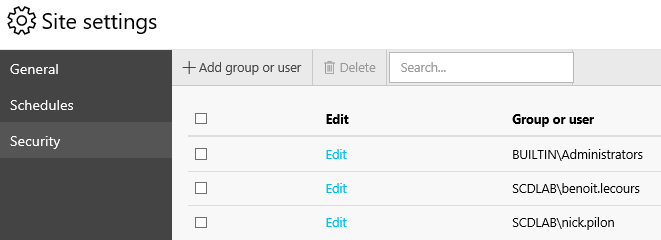
You can download this free report by visiting our product page. The Asset – Compatibility Check report is available in the Report / Asset Section.

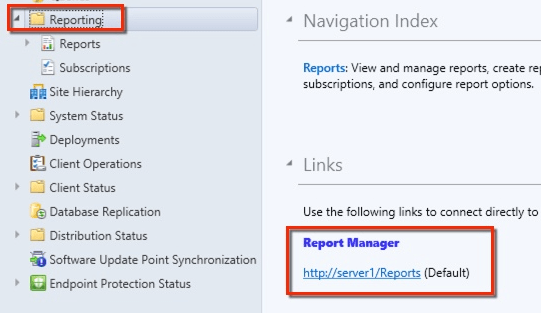
Good to know : How to import an RDL file

Let us know what you think of it.

Share this Post

The post Windows 10 Compatibility Check using SCCM and Report appeared first on System Center Dudes.

SCCM Office 365 Inventory Report

$
0
0

This post describes how to inventory Office 365 using SCCM 1606. We will also provide a free report at the end of the post that you could use on your Reporting Point to easily display Office 365 inventory data.

SCCM 1606 introduces new hardware inventory classes for Office 365 configurations. You no longer need to edit your MOF files to gather Office 365 inventory. If you are using SCCM 1602 or below, follow Jason Sandys post which describes Office 365 inventory process using a MOF customization.

If your goal is to deploy Office 365 updates, refer to our post on how to manage Office 365 updates using SCCM.

SCCM Office 365 inventory report post summary :

  • Office 365 Inventory Data explained
  • How to enable Office 365 Inventory classes
  • Verify Office 365 Inventory data on a client
  • How to upload and use our free Office 365 report

SCCM Office 365 Inventory Report – Direct Download link

If you don’t want to read the whole post, you can download the RDL file directly using this link :

  • You can download this free report by visiting our product page. The Asset – Office 365 report is available in the Report / Asset Section.

Office 365 Inventory Data

Office 365 is using new update channels and update mechanism. Tracking versions and update channels is an important task. The good news is that it’s easy to do using SCCM 1606 but the data needs to be interpreted as it’s not straight forward (mostly for update channel).

Here’s the complete definition of the update channel and their meaning :

Update Channels

ChannelValues
Insider Preview / Monthly (Targeted)http://officecdn.microsoft.com/pr/64256afe-f5d9-4f86-8936-8840a6a4f5be
Monthlyhttp://officecdn.microsoft.com/pr/492350f6-3a01-4f97-b9c0-c7c6ddf67d60
Semi-Annual (Targeted) http://officecdn.microsoft.com/pr/b8f9b850-328d-4355-9145-c59439a0c4cf
Semi-Annualhttp://officecdn.microsoft.com/pr/7ffbc6bf-bc32-4f92-8982-f9dd17fd3114

Other data

Here’s the definition of other information gathered by the new hardware class. We haven’t found definition for all fields, unfortunately, Technet documentation is not completed. If you have any information on your environment, feel free to share it using the comment section.

FieldValue Example
InstallationPathC:\Program Files (x86)\Microsoft Office
ClientInstallationFolderC:\Program Files\Common Files\Microsoft Shared\ClickToRun
VersionToReport (Version)16.0.6741.2056
ClientCulture (Language)en-us / fr-fr
CDNBaseUrl (Channel)See Channels table
UpdatesEnabledTrue / False
Platform (Architecture)x86 / x64
LastScenarioUpdate
LastScenarioResultsSuccess / Failure
CCMManagedUpdateNotify Object
AutoUpgradeTrue / False
GPOChannelSee Channels table
OfficeMgmtCOM?
SharedComputerLicensing?
UpdateURL?

How to enable Office 365 Inventory

After upgrading to SCCM 1606, your Default Client Settings should already gather the new inventory class. Here’s the step to check if it’s enabled :

  • Open the SCCM Console
  • Go to Administration / Client Settings
  • Right-Click your Default Client Setting, select Properties
SCCM Office 365 inventory report
  • Click on Hardware Inventory
  • Click on Set Classes
SCCM Office 365 inventory report
  • Ensure that Office365ProPlusConfiguration is enabled, click OK (remove unneeded field if necessary)
SCCM Office 365 inventory report

Verification

Now that our classes are enabled, trigger a Machine Policy Retrieval & Evaluation Cycle (to have the latest Client Settings) followed by an Hardware inventory Cycle on a computer that has Office installed. Once the inventory is completed, check the inventory using Resource Explorer :

  • In the SCCM Console
  • Right-Click your device, select Start / Resource Explorer
  • Confirm that you have OFFICE365PROPLUSCONFIGURATIONS listed
SCCM Office 365 inventory report

SCCM Office 365 inventory report

Now that your inventory is gathering Office 365 data, we created a report to display the results. This report is free to use.

Sccm office 365 report

To use the report :

Is this information useful? Share your comments using the comment section.

Share this Post

The post SCCM Office 365 Inventory Report appeared first on System Center Dudes.

Identify Office Products with its architecture using SCCM report

$
0
0

I did blog post year ago on Microsoft office product versions with its architecture type and count. But lately, my blog readers have requested to add Office 365 ProPlus product into the report.

The Original Office Product report was created to include all Microsoft Office products from Office 2007 to Office 2016 but it doesn’t have any click-to-run (C2R) products which are Office 365. So we started looking around and developed the report for you.

This free report will have all Microsoft Office products information with its architecture type (x86 or x64) and the count. The report can be run on a specific collection which is useful to scope specific group of machines.

This can be used as all-in-one SCCM report for Microsoft Office product versions with architecture type.

This report comes with a drill-down feature to see the list of all devices with the selected product. You’ll need our Asset –  Installed Software report for the drill-down feature.

sccm report office product
  • Click on the number of installations to see the list of machines. (Available if the Asset – Installed Software is on your server)
sccm report office product

Why does it show more entries than the first report?

The multiple entries are caused because of of the language pack installed on the machine.  1 PC has English, japan and Korea languages installed hence it shows 3 entries.

The 3 entries show also in programs and features as well in resource explorer for the device in SCCM.

You can download this free SCCM Office product report by visiting our product page. The Asset– Office Products report is available to download.

  • For the drill-down report, you also need to download Asset – Installed Software report.
  • Upload both the reports into the same folder, change the data source and run the report.
  • Make sure the views v_GS_Installed_Software WMI class enables for inventory in the Asset Intelligence node.

We hope this SCCM report will help you easily identify all your Office products.

Share this Post

The post Identify Office Products with its architecture using SCCM report appeared first on System Center Dudes.

SCCM report subscription ssrs does not list Email in Drop Down Menu

$
0
0

When configuring your Reporting Service on an SCCM server, one of the popular options is to configure reports to be delivered as an automatic email to recipients in your organization. Unfortunately, this option is not always available in the report Subscription wizard. What can you do when your SCCM report subscription SSRS does not list email in the drop-down menu? But first, let’s define what is exactly a Reporting Services subscription :

Microsoft definition :

A Reporting Services subscription is a configuration that delivers a report at a specific time or in response to an event, and in a file format that you specify. For example, every Wednesday, save the MonthlySales.rdl report as a Microsoft Word document to a file share. Subscriptions can be used to schedule and automate the delivery of a report with a specific set of report parameter values.

You can create multiple subscriptions for a single report to vary the subscription options; for example, you can specify different parameter values to produce three versions of a report, such as a Western region sales report, Eastern region sales, and all sales.

When you first try to create an email subscription in your SCCM reporting server, you only have the Windows Share choice in the drop-down menu. Email is missing from the list.

SCCM report subscription in ssrs

Cause

The principal cause of this issue is that your SSRS is not configured properly to send emails.

SCCM report subscription ssrs – Resolution

To fix this issue, your must configure Reporting Service Configuration Manager correctly to accept emails :

  • Log to your SSRS server
  • Open Reporting Service Configuration Manager
  • Click on the Email Settings tab
  • Enter the settings of your sender address and SMTP server
  • Click Apply
report subscription in ssrs

Verification

Once completed, go back to SCCM and create a new subscription. The Email option will now show in the drop-down menu.

report subscription in ssrs

The post SCCM report subscription ssrs does not list Email in Drop Down Menu appeared first on System Center Dudes.

SCCM Upload RDL File to Report Server

$
0
0

SCCM Reporting is a great way to see insight of your inventory and data. There’s many custom reports out there on the internet. If you download a custom report, you’ll have a RDL file. This RDL then need to be uploaded on your report server. You can do it manually using the web portal or use a script. This post will show all the ways you can upload an RDL file on an SCCM Reporting Point.

An RDL file is simply an XML application and a standard proposed by Microsoft for defining reports.

SCCM Upload RDL file Requirements

SCCM Upload Rdl file

Upload the RDL file manually

We suggest uploading your file into a Test folder before releasing the report in production. If you have multiple report to upload (Ex : if you are a subscription member and want all reports on your reporting point), see the next section to upload using a script.

  • Open a web browser and browse to your reporting point
  • Usually this will be http://yourreportingpoint/reports
  • You can also double check your reporting point URL in the SCCM console in Monitoring / Reporting
  • The Report manager URL will be listed there
SCCM Upload Rdl file
  • Browse to the respective folder where you want to upload your file and click Upload File.
SCCM Upload Rdl file
  • Find your file location, and select the file. If you already have a report to that name a dialog box will ask if you want to overide the report.
  • If the upload is successful, the report will appear else you will have an error message explaining the failure. Any unhealthy RDL file will fail at this process.
SCCM Upload Rdl file

Change the Data Source

Once your RDL file is uploaded, there are still a few things to change to make it work perfectly.

  • Click the 3 little dot, an options menu will appear. Click on Manage.
  • In the Properties tab, change the description if needed. This description will be displayed to describe the report to your users, click Apply
SCCM Upload Rdl file
  • In the Data Sources tab, select your data source or the report will not process. To select your data source, click on Browse and select an existing data source in the appropriate folder. It will be at the bottom of the folder structure.
  • The SCCM default datasource is always {5C6358F2-4BB6-4a1b-A16E-8D96795D8602}
SCCM Upload Rdl file
  • Click Apply
  • (Optional)In the Security tab, add security groups or users who want to run your report. The security settings will be enforced by the new parent folder security settings. Don’t be surprised if the access change after moving the report into production.
Upload RDL file to Report Server

Automaticaly Upload RDL File using a script

If you have multiple RDL files and data sources to change, you can use our SCCM Reports Manager Tool freely available on my Github account.

The tool allows to :

  • Upload multiple reports from a specific folder — Useful if you have multiple RDL files to upload at once
  • Download all report from a specific SSRS folder — Useful if you have multiple custom reports and are doing a migration to a new reporting point
  • Change data source of all reports from a specific SSRS folder — Useful if you upload multiple new reports and need to change their data sources

The script needs PowerShell 2.0 and has been tested on SQL 2012, 2016 and 2019 Reporting Point.

Summary

Adding a report with the web portal isn’t the fastest way but it requires the least prerequisites. It’s pretty straightforward. Make sure your SCCM RDL file is not corrupted and the data source is well configured. Lastly, verify security settings before sending the link to users.

The post SCCM Upload RDL File to Report Server appeared first on System Center Dudes.

SCCM Report Builder Error – The Certificate Chain was issued by an Authority that is not Trusted

$
0
0

If you’re like us and love to create and build awesome reports, you may get an error when running report builder on a remote computer. When editing an SCCM report in Report Builder you may receive the following error: A connection was successfully established with the server, but then an error occurred during the login process. (provider: SSL Provider, error: 0 – The certificate chain was issued by an authority that is not trusted.)

SCCM Report Builder error

SCCM Report Builder error – Cause

This error occurs because you don’t have the required SCCM SQL certificate on the computer running Report Builder. Follow the following steps in order to resolve the issue.

Export the certificate from your SQL server

  • On the SQL Server
  • Click the Start menu, click Run, and then type mmc. Click Enter. This starts the Microsoft Management Console (MMC)
  • In the console, click the File menu and then click Add/Remove Snap-in
  • On the Snap-in list, select Certificates and then click Add
SCCM Report Builder error
  • In the Certificates Snap-in window, select Computer account, and then click Next
  • In the Select Computer window, select Local computer, and then click Finish. This adds the Certificates Snap-in to the list. Close the window.
SCCM Report Builder error
  • Browse to Console Root / Certificate (Local Computer) / Personal / Certificates
  • Right-click your ConfigMgr SQL certificate
SCCM Report Builder error
  • Select All Tasks and Export
SCCM Report Builder error
  • Select default choices in the Certificate Export Wizard (Next,Next,Next)
  • Export the certificate file (.CER) to the machine where you run Report Builder

Import the SQL certificate on the remote machine

  • On the machine running Report Builder
  • Click the Start menu, click Run, and then type mmc. Click Enter. This starts the Microsoft Management Console (MMC)
  • In the console, click the File menu and then click Add/Remove Snap-in
  • In the Add/Remove Snap-in window, click the Add button
  • On the Snap-in list, select Certificates and then click Add
  • In the Certificates Snap-in window, select Computer account, and then click Next
  • In the Select Computer window, select Local computer, and then click Finish. This adds the Certificates Snap-in to the list. Close the window
  • Browse to Console Root / Certificate (Local Computer) / Trusted Root Certification Authorities / Certificates
  • Right-click Certificate and select All Tasks / Import
SCCM Report Builder error
  • In the Certificate Import Wizard click browse and select the exported certificate
  • Ensure that the certificate is placed in the Trusted Root Certification Authorities, click Next
SCCM Report Builder error
  • Click Finish to complete the wizard

That’s it, reopen Report Builder and the Microsoft SQL certificate error will be gone.

The post SCCM Report Builder Error – The Certificate Chain was issued by an Authority that is not Trusted appeared first on System Center Dudes.

SCCM report subscription ssrs does not list Email in Drop Down Menu

$
0
0

When configuring your Reporting Service on an SCCM server, one of the popular options is to configure reports to be delivered as an automatic email to recipients in your organization. Unfortunately, this option is not always available in the report Subscription wizard. What can you do when your SCCM report subscription SSRS does not list email in the drop-down menu? But first, let’s define what is exactly a Reporting Services subscription :

Microsoft definition :

A Reporting Services subscription is a configuration that delivers a report at a specific time or in response to an event, and in a file format that you specify. For example, every Wednesday, save the MonthlySales.rdl report as a Microsoft Word document to a file share. Subscriptions can be used to schedule and automate the delivery of a report with a specific set of report parameter values.

You can create multiple subscriptions for a single report to vary the subscription options; for example, you can specify different parameter values to produce three versions of a report, such as a Western region sales report, Eastern region sales, and all sales.

When you first try to create an email subscription in your SCCM reporting server, you only have the Windows Share choice in the drop-down menu. Email is missing from the list.

SCCM report subscription in ssrs

Cause

The principal cause of this issue is that your SSRS is not configured properly to send emails.

SCCM report subscription ssrs – Resolution

To fix this issue, your must configure Reporting Service Configuration Manager correctly to accept emails :

  • Log to your SSRS server
  • Open Reporting Service Configuration Manager
  • Click on the Email Settings tab
  • Enter the settings of your sender address and SMTP server
  • Click Apply
report subscription in ssrs

Verification

Once completed, go back to SCCM and create a new subscription. The Email option will now show in the drop-down menu.

report subscription in ssrs

The post SCCM report subscription ssrs does not list Email in Drop Down Menu appeared first on System Center Dudes.


SCCM Upload RDL File to Report Server

$
0
0

SCCM Reporting is a great way to see insight of your inventory and data. There’s many custom reports out there on the internet. If you download a custom report, you’ll have a RDL file. This RDL then need to be uploaded on your report server. You can do it manually using the web portal or use a script. This post will show all the ways you can upload an RDL file on an SCCM Reporting Point.

An RDL file is simply an XML application and a standard proposed by Microsoft for defining reports.

SCCM Upload RDL file Requirements

SCCM Upload Rdl file

Upload the RDL file manually

We suggest uploading your file into a Test folder before releasing the report in production. If you have multiple report to upload (Ex : if you are a subscription member and want all reports on your reporting point), see the next section to upload using a script.

  • Open a web browser and browse to your reporting point
  • Usually this will be http://yourreportingpoint/reports
  • You can also double check your reporting point URL in the SCCM console in Monitoring / Reporting
  • The Report manager URL will be listed there
SCCM Upload Rdl file
  • Browse to the respective folder where you want to upload your file and click Upload File.
SCCM Upload Rdl file
  • Find your file location, and select the file. If you already have a report to that name a dialog box will ask if you want to overide the report.
  • If the upload is successful, the report will appear else you will have an error message explaining the failure. Any unhealthy RDL file will fail at this process.
SCCM Upload Rdl file

Change the Data Source

Once your RDL file is uploaded, there are still a few things to change to make it work perfectly.

  • Click the 3 little dot, an options menu will appear. Click on Manage.
  • In the Properties tab, change the description if needed. This description will be displayed to describe the report to your users, click Apply
SCCM Upload Rdl file
  • In the Data Sources tab, select your data source or the report will not process. To select your data source, click on Browse and select an existing data source in the appropriate folder. It will be at the bottom of the folder structure.
  • The SCCM default datasource is always {5C6358F2-4BB6-4a1b-A16E-8D96795D8602}
SCCM Upload Rdl file
  • Click Apply
  • (Optional)In the Security tab, add security groups or users who want to run your report. The security settings will be enforced by the new parent folder security settings. Don’t be surprised if the access change after moving the report into production.
Upload RDL file to Report Server

Automaticaly Upload RDL File using a script

If you have multiple RDL files and data sources to change, you can use our SCCM Reports Manager Tool freely available on my Github account.

The tool allows to :

  • Upload multiple reports from a specific folder — Useful if you have multiple RDL files to upload at once
  • Download all report from a specific SSRS folder — Useful if you have multiple custom reports and are doing a migration to a new reporting point
  • Change data source of all reports from a specific SSRS folder — Useful if you upload multiple new reports and need to change their data sources

The script needs PowerShell 2.0 and has been tested on SQL 2012, 2016 and 2019 Reporting Point.

Summary

Adding a report with the web portal isn’t the fastest way but it requires the least prerequisites. It’s pretty straightforward. Make sure your SCCM RDL file is not corrupted and the data source is well configured. Lastly, verify security settings before sending the link to users.

The post SCCM Upload RDL File to Report Server appeared first on System Center Dudes.

SCCM Report Builder Error – The Certificate Chain was issued by an Authority that is not Trusted

$
0
0

If you’re like us and love to create and build awesome reports, you may get an error when running report builder on a remote computer. When editing an SCCM report in Report Builder you may receive the following error: A connection was successfully established with the server, but then an error occurred during the login process. (provider: SSL Provider, error: 0 – The certificate chain was issued by an authority that is not trusted.)

SCCM Report Builder error

SCCM Report Builder error – Cause

This error occurs because you don’t have the required SCCM SQL certificate on the computer running Report Builder. Follow the following steps in order to resolve the issue.

Export the certificate from your SQL server

  • On the SQL Server
  • Click the Start menu, click Run, and then type mmc. Click Enter. This starts the Microsoft Management Console (MMC)
  • In the console, click the File menu and then click Add/Remove Snap-in
  • On the Snap-in list, select Certificates and then click Add
SCCM Report Builder error
  • In the Certificates Snap-in window, select Computer account, and then click Next
  • In the Select Computer window, select Local computer, and then click Finish. This adds the Certificates Snap-in to the list. Close the window.
SCCM Report Builder error
  • Browse to Console Root / Certificate (Local Computer) / Personal / Certificates
  • Right-click your ConfigMgr SQL certificate
SCCM Report Builder error
  • Select All Tasks and Export
SCCM Report Builder error
  • Select default choices in the Certificate Export Wizard (Next,Next,Next)
  • Export the certificate file (.CER) to the machine where you run Report Builder

Import the SQL certificate on the remote machine

  • On the machine running Report Builder
  • Click the Start menu, click Run, and then type mmc. Click Enter. This starts the Microsoft Management Console (MMC)
  • In the console, click the File menu and then click Add/Remove Snap-in
  • In the Add/Remove Snap-in window, click the Add button
  • On the Snap-in list, select Certificates and then click Add
  • In the Certificates Snap-in window, select Computer account, and then click Next
  • In the Select Computer window, select Local computer, and then click Finish. This adds the Certificates Snap-in to the list. Close the window
  • Browse to Console Root / Certificate (Local Computer) / Trusted Root Certification Authorities / Certificates
  • Right-click Certificate and select All Tasks / Import
SCCM Report Builder error
  • In the Certificate Import Wizard click browse and select the exported certificate
  • Ensure that the certificate is placed in the Trusted Root Certification Authorities, click Next
SCCM Report Builder error
  • Click Finish to complete the wizard

That’s it, reopen Report Builder and the Microsoft SQL certificate error will be gone.

The post SCCM Report Builder Error – The Certificate Chain was issued by an Authority that is not Trusted appeared first on System Center Dudes.

Free Readiness MEMCM / SCCM Windows 11 Report

$
0
0

Windows 11 was officially announced on June 24th, 2021, and the first ISO was released last week. Windows 11 is coming, and as an SCCM administrator, you must get ready to deploy this new OS. We released a complete post on everything you need to know about this significant OS release. This blog post will focus on Windows 11 readiness. How can you ensure your device is ready to install Windows 11? The best solution as of today is to build an SCCM Windows 11 report to list which device is prepared and which needs attention.

Windows 10 was specifically designed to run on older hardware; Windows 11 requires new hardware, and you’ll not be able to install it on older PCs. Most PCs built in 2019 or later will work with Windows 11, although some exceptions exist. Older hardware is less likely to pass Windows 11’s prerequisite checks. PCs purchased in 2016 or earlier are almost sure to be unsupported.

Windows 11 also requires a Trusted Platform Module (TPM), UEFI firmware (no legacy BIOS allowed) and Secure Boot. Virtually all PCs designed and built since 2015 include TPM 2.0 support, but you might have to go into the firmware settings to enable it.

Here are Microsoft’s official requirements for Windows 11

Processor:1 gigahertz (GHz) or faster with 2 or more cores on a compatible 64-bit processor or System on a Chip (SoC)
RAM:4 gigabyte (GB)
Storage:64 GB or larger storage device
System firmware:UEFI, Secure Boot capable
TPM:Trusted Platform Module (TPM) version 2.0
Graphics card:Compatible with DirectX 12 or later with WDDM 2.0 driver
Display:High definition (720p) display that is greater than 9” diagonally, 8 bits per colour channel

As you can see, a couple of checks exist to install Windows 11. If you have SCCM installed, you can build a report to find your compliant devices. We have good news for you: We made it for you, and it’s available for free!

Windows 11 Readiness Report

Updated 2023/11/16 :

  • #1 – Tweaking SQL queries
  • #2 – Resolving a lot of known issues like CPU, Model, TPM, etc
  • #3 – The latest Windows 10 version added
  • #4 – Revamp header experience
  • #5 – Changing colours and details

Updated 2022/02/17 :

Based on Microsoft’s recommendations, we built this report to list which machines could or couldn’t install Windows 11.

Here are the detailed specifications of the report :

  • List: Device Name, UserName, Client Status, Client Version, OS Edition, OS Version, OS Branch, CPU Speed, Supported Intel CPU, RAM, Free Space, Device Manufacturer, Device Model, Secure Boot Status, UEFI Bios status, TPM version and status.
  • 6 comprehensive pie charts to list a count of compliant devices in each category
  • Red highlight if a component did not match Microsoft’s minimum requirement
  • You can scope the report using a Collection or enter a device name to show its status. You can also choose to display only non-compliant devices.

Download the SCCM Windows 11 report

The report is available for free on our shop website. You only need to download the report and install it on your reporting server. You can read our blog post on how to install a report if you need clarification.

SCCM Windows 11 Report

We hope this report is helpful. Please share your comments if you have any ideas to improve it!

The post Free Readiness MEMCM / SCCM Windows 11 Report appeared first on System Center Dudes.

Viewing all 31 articles
Browse latest View live