SCCM Reporting is a great way to see insight of your inventory and data. There’s many custom reports out there on the internet. If you download a custom report, you’ll have a RDL file. This RDL then need to be uploaded on your report server. You can do it manually using the web portal or use a script. This post will show all the ways you can upload an RDL file on an SCCM Reporting Point.
An RDL file is simply an XML application and a standard proposed by Microsoft for defining reports.
SCCM Upload RDL file Requirements
- SSRS installed and all running components. If you don’t have a reporting server, you can refer to our post on how to install SCCM 2012 Reporting Services Point.
- A healthy RDL file.
- A user account with enough access to upload a report. Please read predefined roles on MSDN for more detailed information.
Upload the RDL file manually
We suggest uploading your file into a Test folder before releasing the report in production. If you have multiple report to upload (Ex : if you are a subscription member and want all reports on your reporting point), see the next section to upload using a script.
- Open a web browser and browse to your reporting point
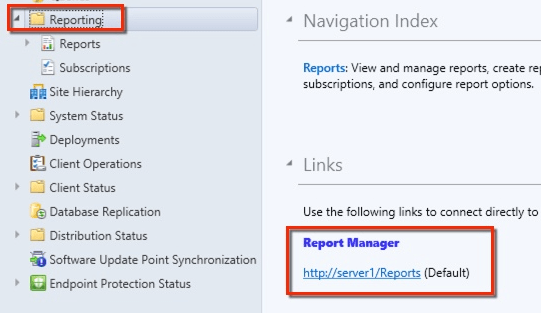
- Usually this will be http://yourreportingpoint/reports
- You can also double check your reporting point URL in the SCCM console in Monitoring / Reporting
- The Report manager URL will be listed there
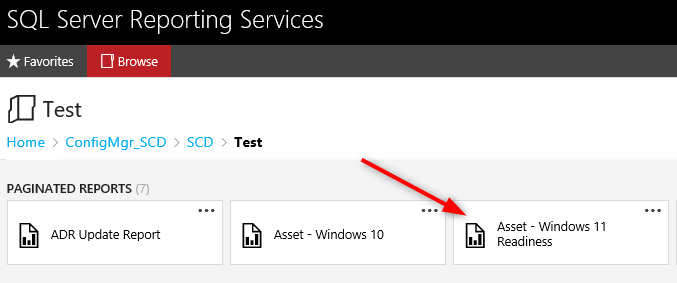
- Browse to the respective folder where you want to upload your file and click Upload File.
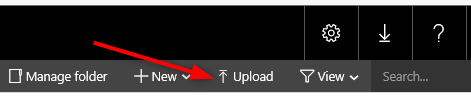
- Find your file location, and select the file. If you already have a report to that name a dialog box will ask if you want to overide the report.
- If the upload is successful, the report will appear else you will have an error message explaining the failure. Any unhealthy RDL file will fail at this process.
Change the Data Source
Once your RDL file is uploaded, there are still a few things to change to make it work perfectly.
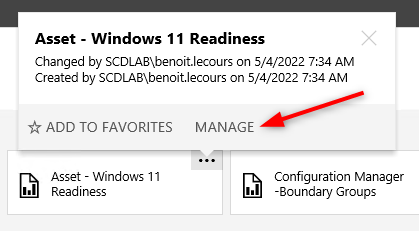
- Click the 3 little dot, an options menu will appear. Click on Manage.
- In the Properties tab, change the description if needed. This description will be displayed to describe the report to your users, click Apply

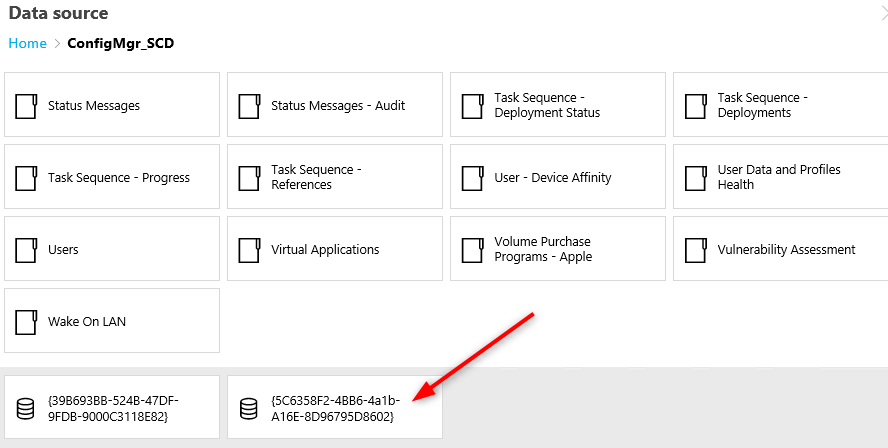
- In the Data Sources tab, select your data source or the report will not process. To select your data source, click on Browse and select an existing data source in the appropriate folder. It will be at the bottom of the folder structure.
- The SCCM default datasource is always {5C6358F2-4BB6-4a1b-A16E-8D96795D8602}
- Click Apply
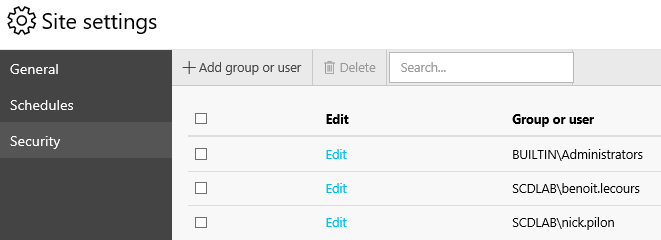
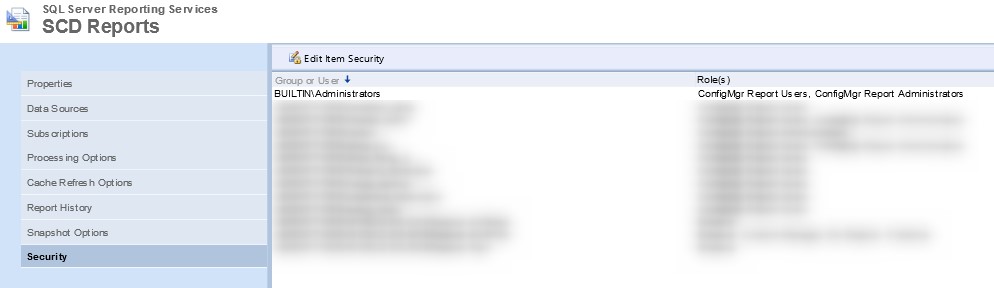
- (Optional)In the Security tab, add security groups or users who want to run your report. The security settings will be enforced by the new parent folder security settings. Don’t be surprised if the access change after moving the report into production.
Automaticaly Upload RDL File using a script
If you have multiple RDL files and data sources to change, you can use our SCCM Reports Manager Tool freely available on my Github account.
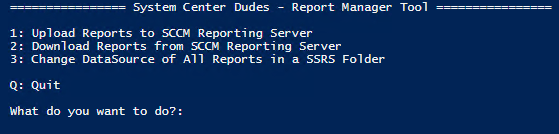
The tool allows to :
- Upload multiple reports from a specific folder — Useful if you have multiple RDL files to upload at once
- Download all report from a specific SSRS folder — Useful if you have multiple custom reports and are doing a migration to a new reporting point
- Change data source of all reports from a specific SSRS folder — Useful if you upload multiple new reports and need to change their data sources
The script needs PowerShell 2.0 and has been tested on SQL 2012, 2016 and 2019 Reporting Point.
Summary
Adding a report with the web portal isn’t the fastest way but it requires the least prerequisites. It’s pretty straightforward. Make sure your SCCM RDL file is not corrupted and the data source is well configured. Lastly, verify security settings before sending the link to users.
The post SCCM Upload RDL File to Report Server appeared first on System Center Dudes.